Sewing-4-Sanity
Thriving not just surviving
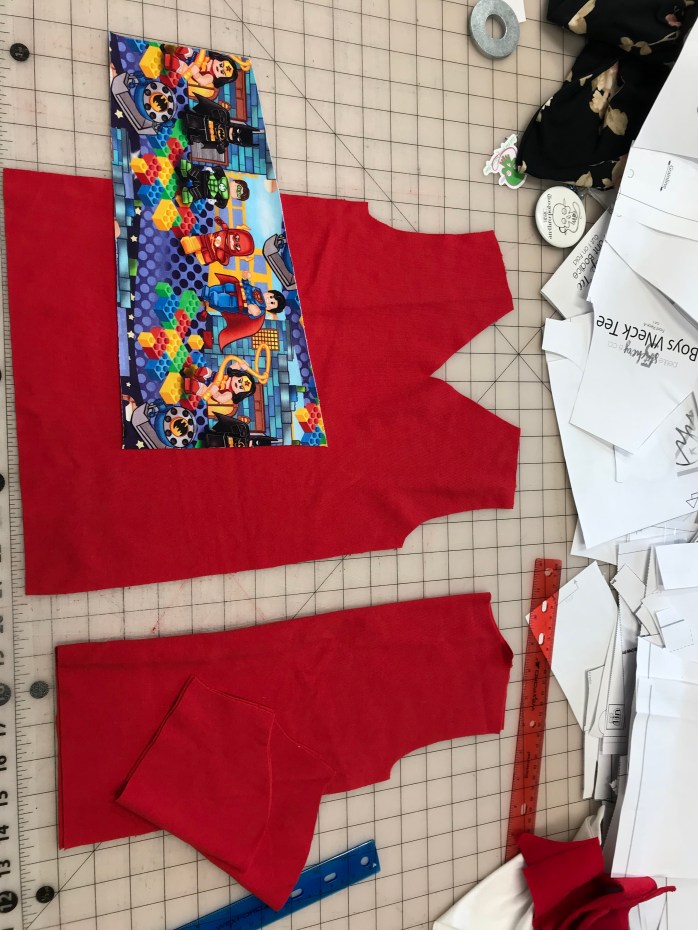
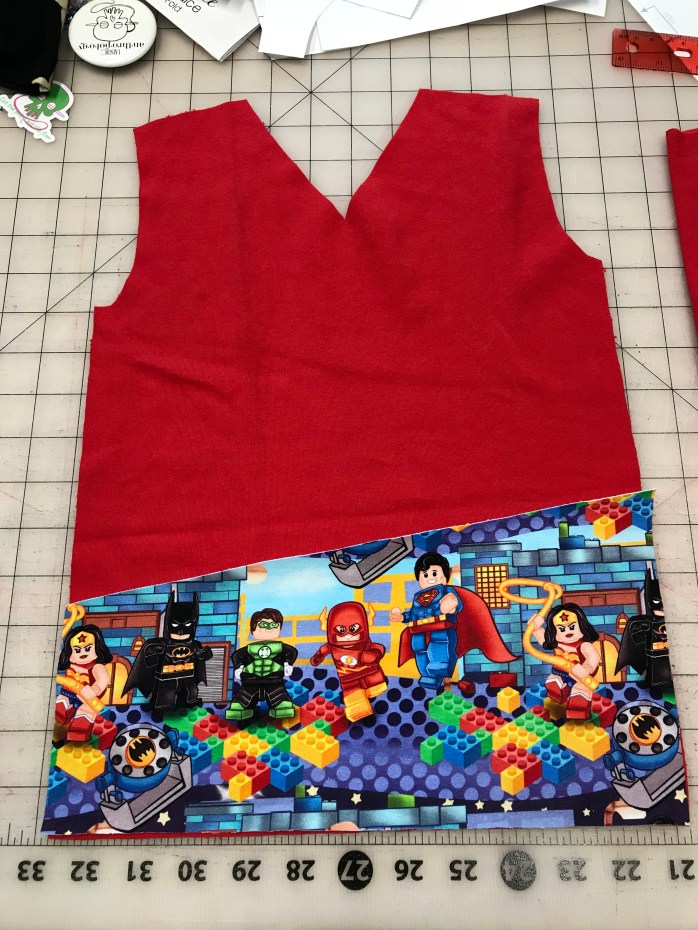
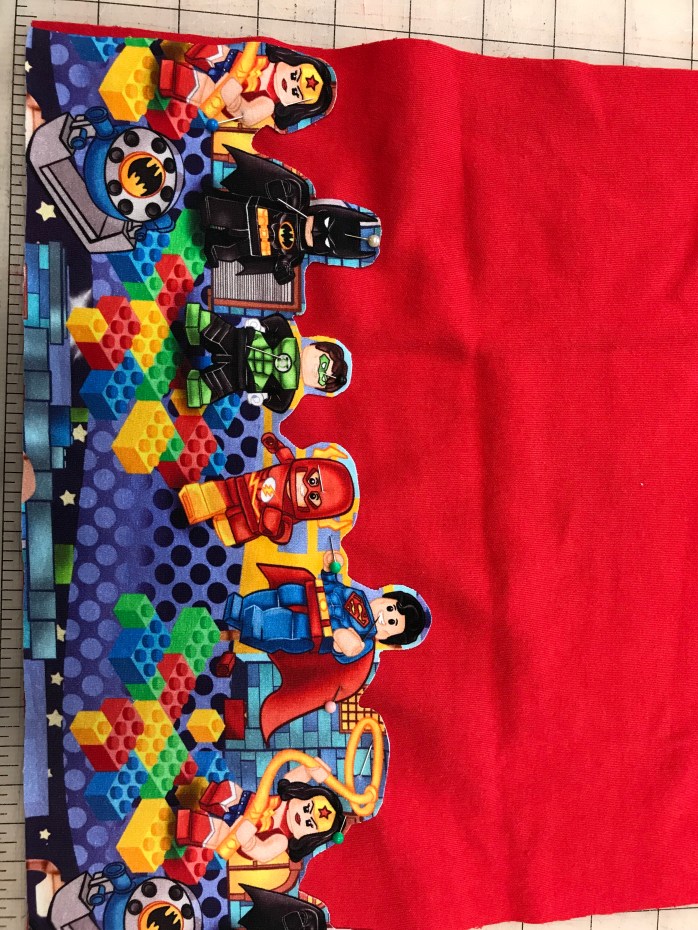
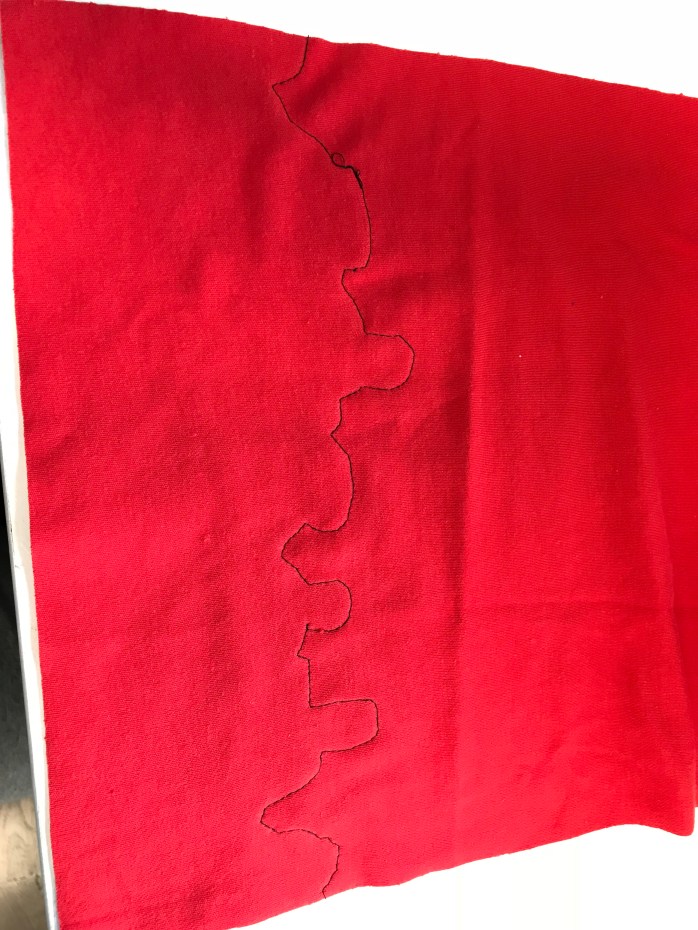
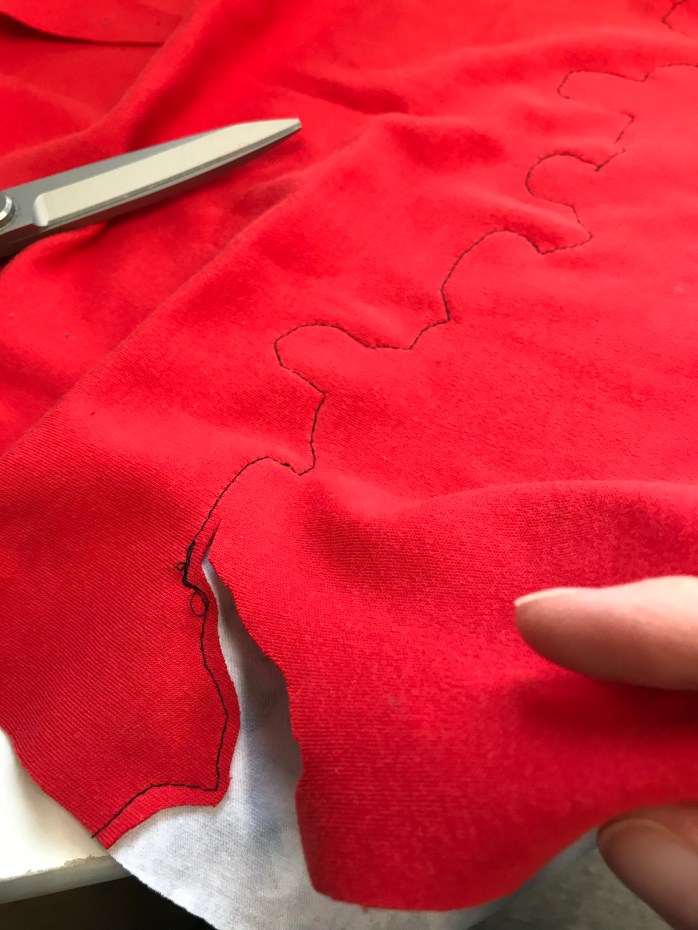
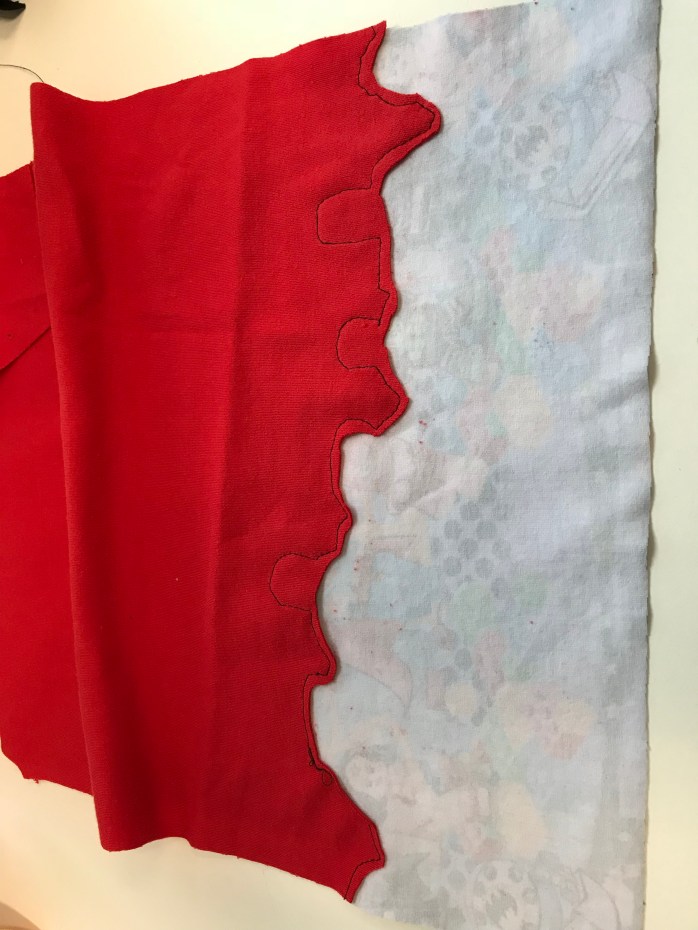
Quick Guide to Appliqué with Custom Fabric

I love adding a little extra pizazz when working with custom fabrics by doing applique. Here’s a little picture tutorial on how to do it (or at least one way!)…I plan to come back and add written instructions, but in the meantime, hopefully you will find the pictures helpful! ❤


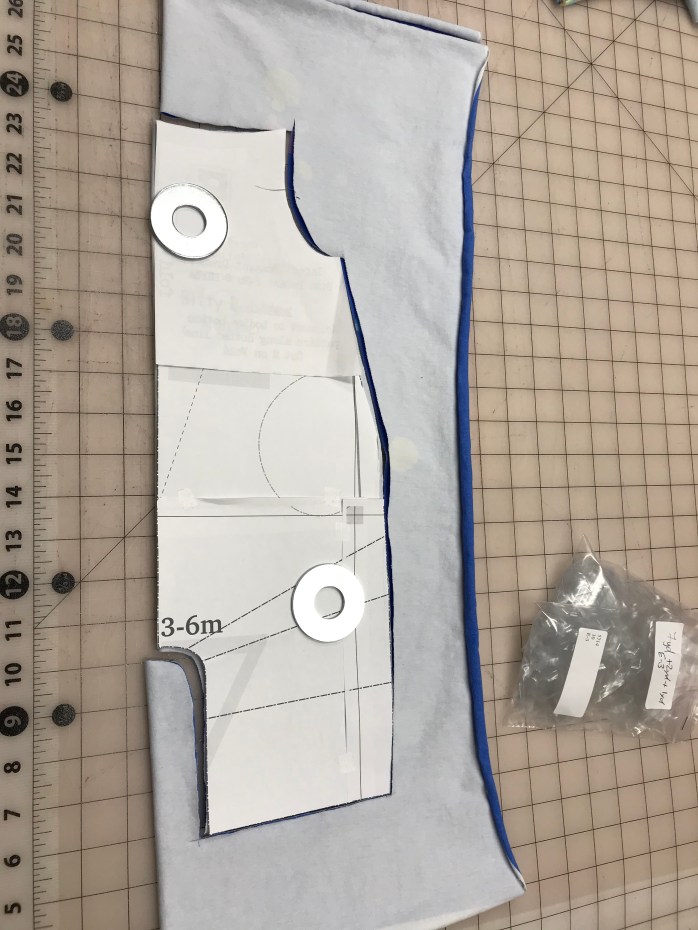
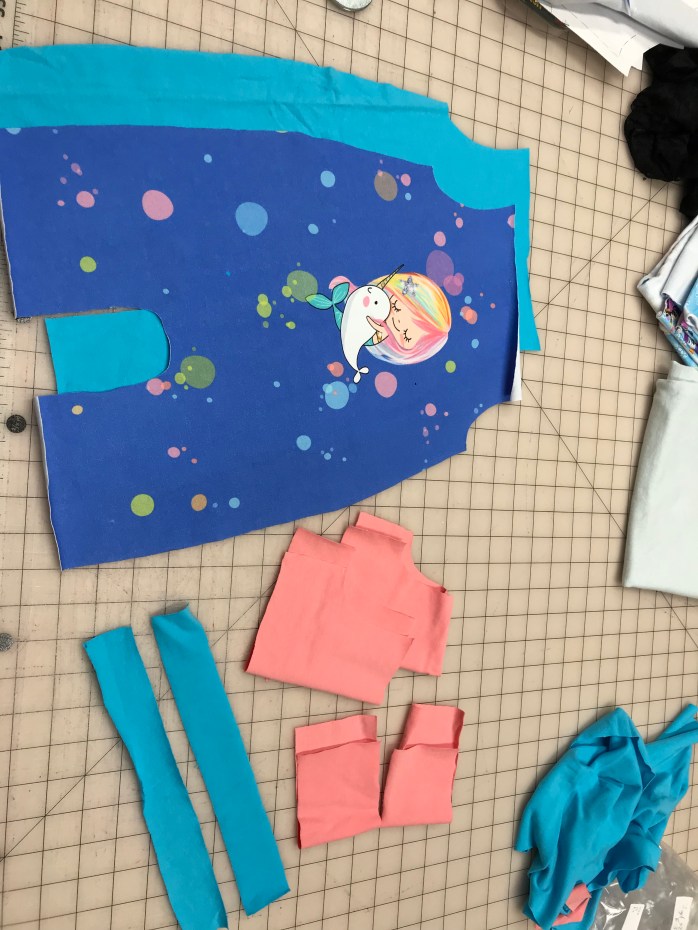
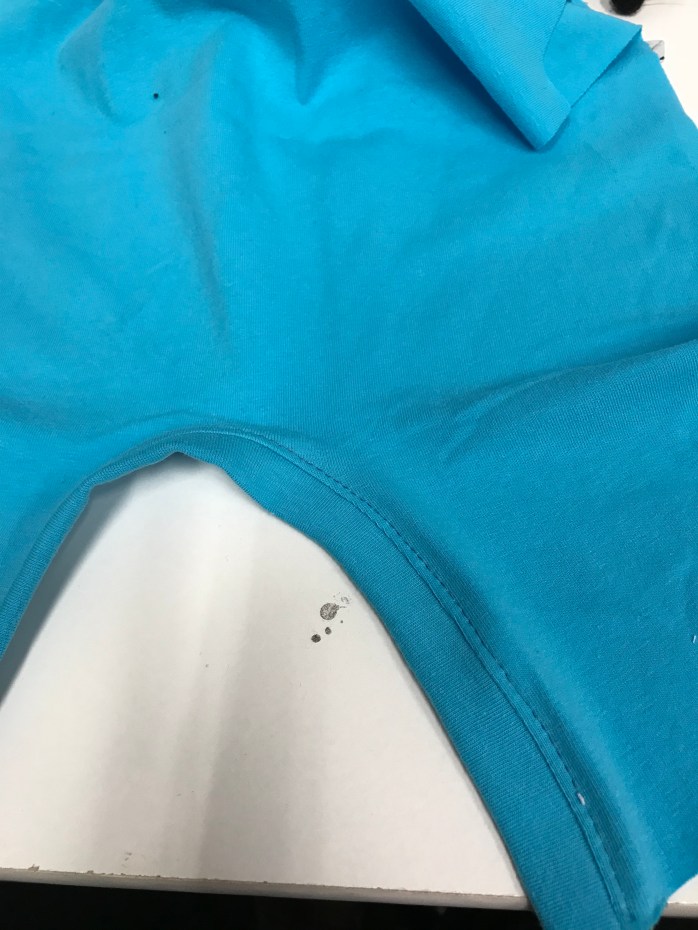
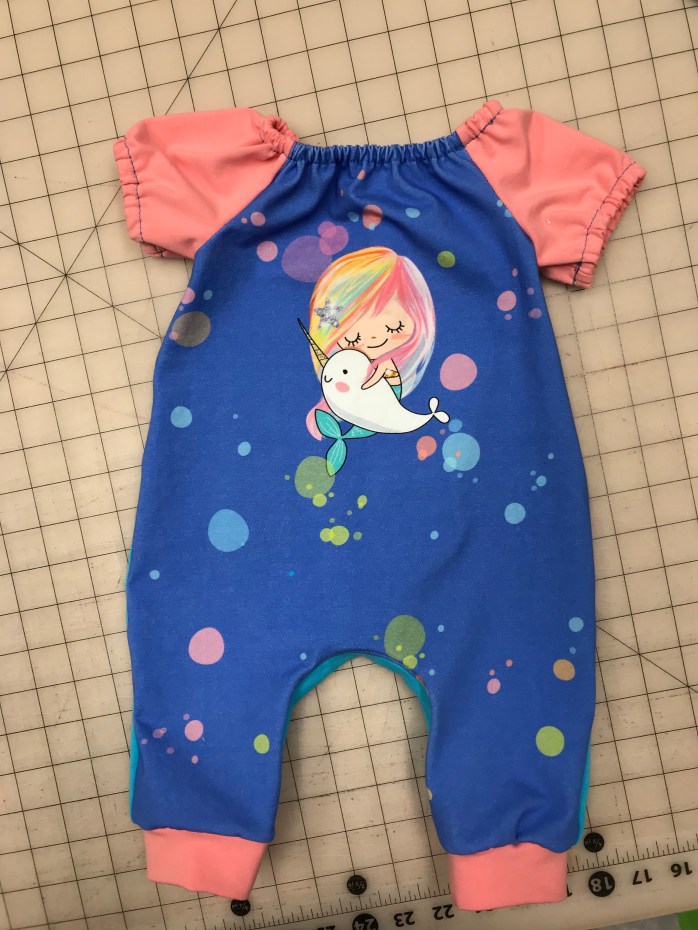
Adding Sleeves to the Bitty Bubble Romper – A Tutorial

Here’s how I added sleeves to the bitty bubble romper:
For this tutorial I used a peasant sleeve pattern. As you can see in the picture below, to created the front piece, I matched the armscye point of the bitty bubble pattern with that same part of the bodice from the peasant dress. Since the peasant dress bodice is the same front and back, I just made two of these pieces.
You could use the same method with a raglan pattern or other shirt pattern, but if the back pieces are different you would need to make separate pieces.
Because the only way to get the bitty bubble on and off normally is pulling down the straps, you also need to add crotch snaps if you’re going to add sleeve (if you want it to be an easy diaper change anyways! You could technically pull a peasant dress on and off through the neck hole, but crotch snaps are more convenient in my opinion!)
So to do this, the first step is to measure the crotch curve.
This size (3-6 months) I got a measurement of about 10.5.” I cut a 2″ piece of binding to use for snaps the exact same length.

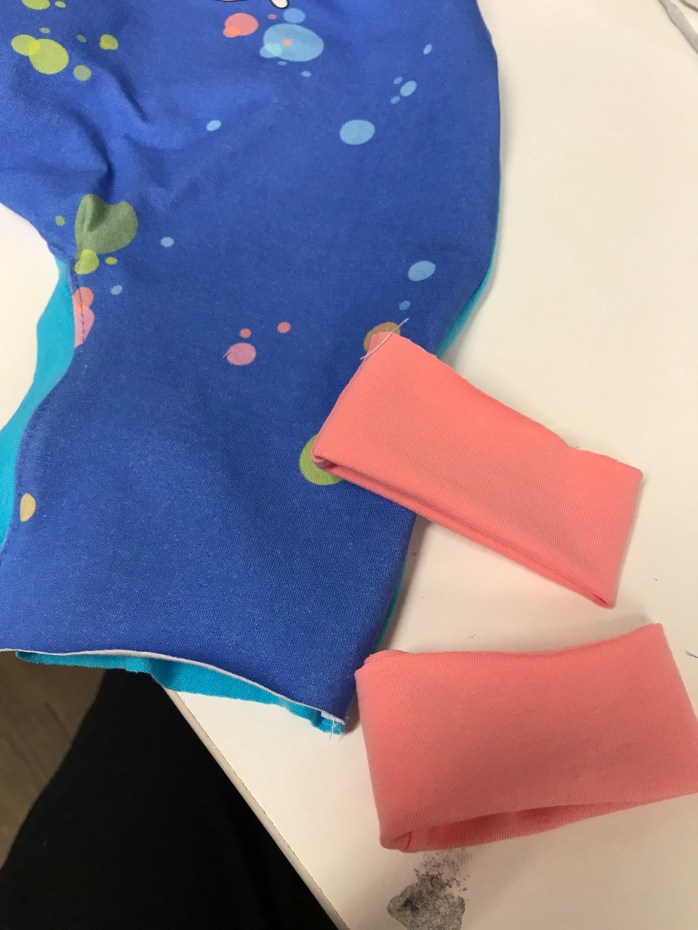
These are all of the pieces you should have once you have everything cut:
Front piece (1)
Back piece (1)
Sleeves (2)
Leg Cuffs (I’m making the pants version of the romper) (2)
Snap bindings (2)
**** The first time I made this I got the front and the back pieces backwards, so the pictures show the opposite of how the final turned out (lots of seam ripping had to occur, don’t make my same mistake!). So follow the instructions as written, not the next few pictures when doing front versus back! ****
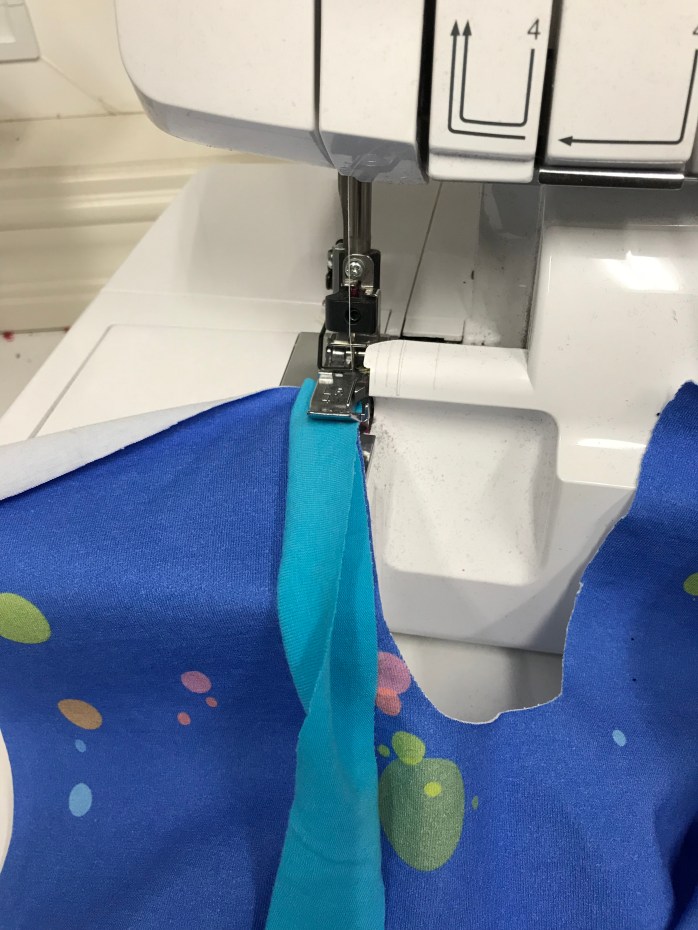
Fold the binding for the snaps in half, wrong sides together, matching the raw edges up. Then sew that binding to the right side of the back piece. Because the crotch curve and the binding are the same length, you should not have to stretch.
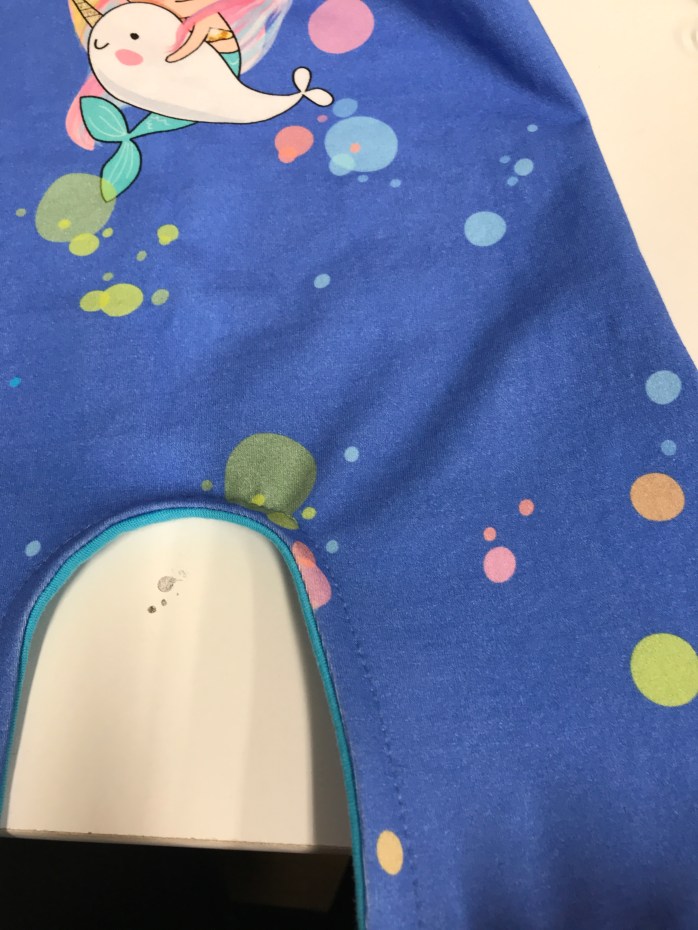
This is what it will look like (although remember this is the back!)…

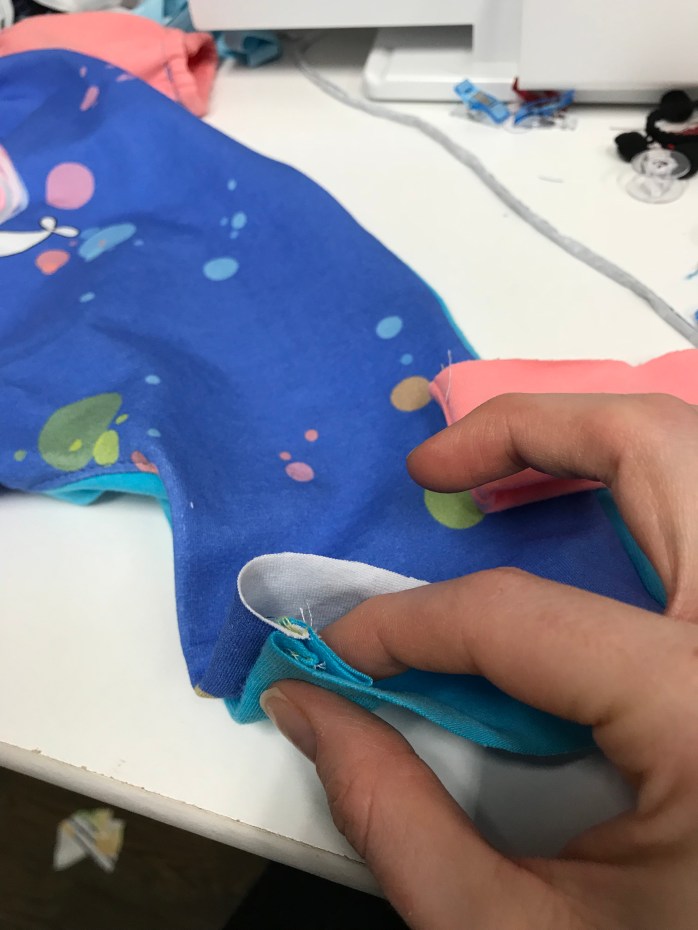
Now flip the binding to the wrong side of the back piece and stitch in place 3/8″ to 1/2″ away from the edge.
For the front piece, you’re going to do almost the same thing, but there are a couple of important differences! You aren’t going to flip the front to the back and stitch in place so you need to add a stabilizer for the snaps. I usually add a piece of woven fabric if I don’t have stabilizer on hand, but you want to sandwich it between your binding layers before you stitch the binding to the front of the romper.
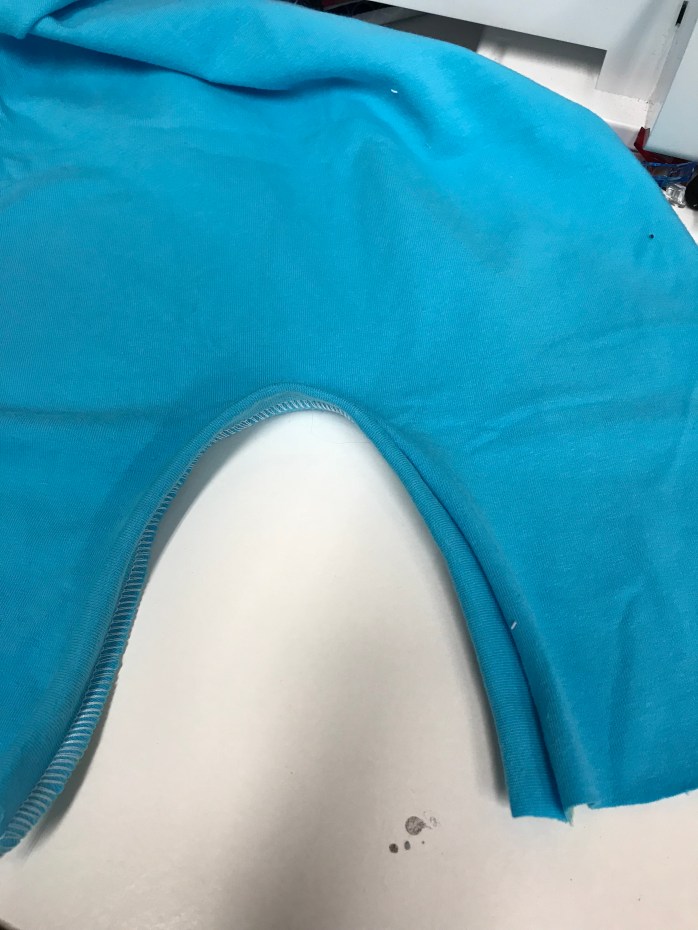
After you attach the binding, topstitch around the front of the crotch curve instead of flipping it under.
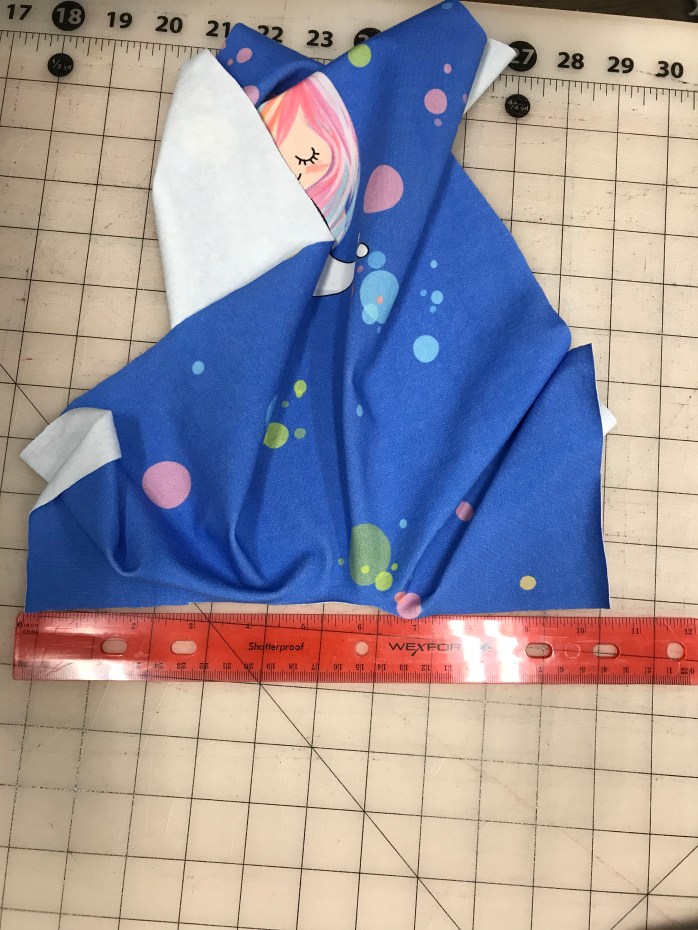
Then finish constructing the pattern as indicated until you get to the cuffs (so attach the sleeves to the bodice, sew the side seams together, for the peasant pattern create the casings and add elastic). This is what it looks like before you add cuffs:

Prepare your cuffs as instructed in the pattern so they’re ready…
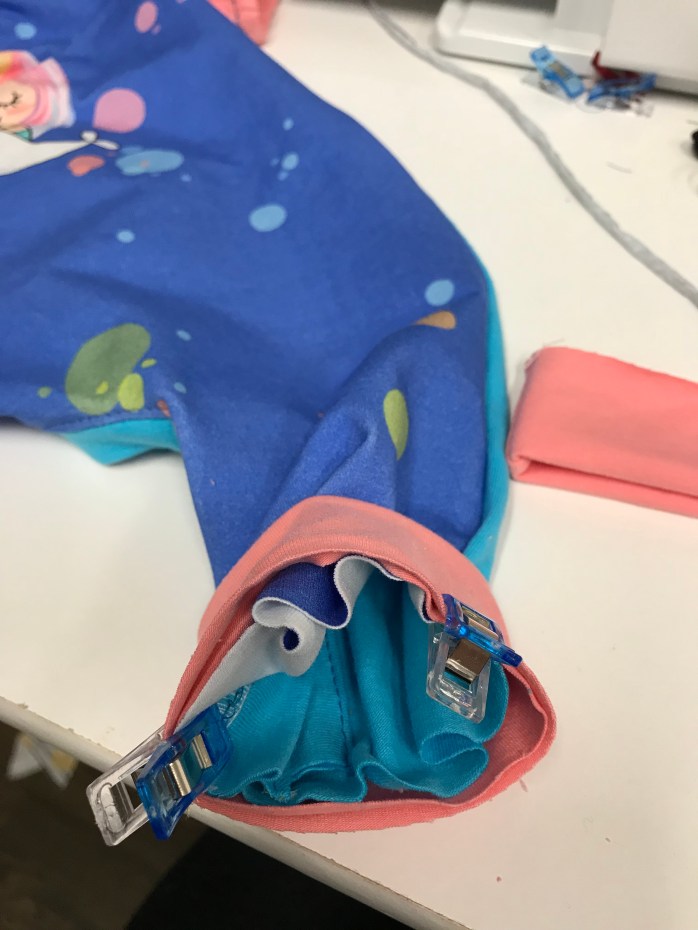
Now, do make it to where the snaps work best, you want to take the back piece and wrap it around to match up to the snap binding on the front piece. Baste that overlap in place.
Now add your cuffs as normal…
Add your snaps and you’re done!
I usually do about 2″-2.5″ in between my snaps if you’re unsure about placement. 🙂
Quick Ruffle Bum Tutorial

I have to admit, when we found out we were having a girl, I was terrified of ruffles. I’ve come a long way in the last few months! Here’s a quick and dirty method to add ruffles to the bum of bloomers, shorts, pants, dresses, or whatever you’d like to ruffle!
What you need to get started:
- Whatever you plan to put ruffles on – for this tutorial I’m using Bitty Bubble romper bloomers.
- Knit fabric to make the ruffles
- Pins
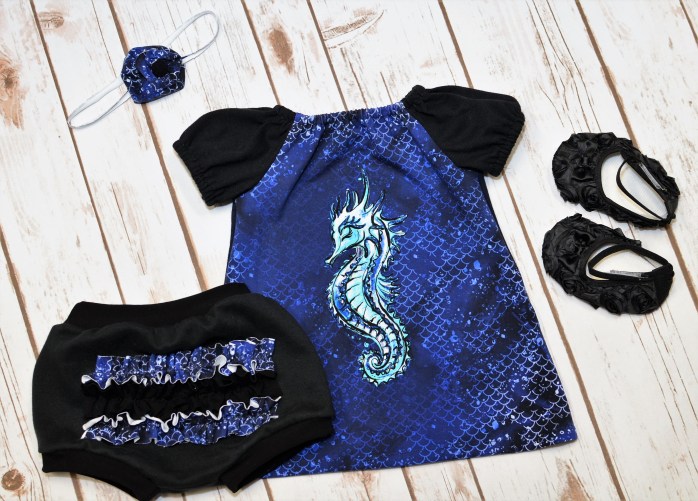
I’m using fabric from Smoogie Fabrics for my ruffles (leftover from the Seahorse panel).
Step 1: Cut out the back pattern piece that you plan to add ruffles to.

Step 2: Now you want to cut some ruffles. I’m using the scraps from the Seahorse panel I used for the dress, so mine are going to be a little shorter than I would have otherwise liked. I cut mine about 1.5″ wide and you want the length to be about twice as long as you want the finished ruffle. Some people prefer to have the ruffle go all the way across the bum, but because I’m limited by my scrap size, I did mine shorter.
 I cut three, but here are what the first two looked like once I had them cut. I laid them across the bum piece to give you an idea of length.

Note: I don’t mind the look of an unfinished edge when using cotton/lycra blend fabrics and leaving the edge raw saves me time (who doesn’t like that, right?!), but…if you’re using a different type of material or the raw edge bothers you, you will want to finish the edge before you gather. You can do this by doing a rolled hem, regular hem, or lettuce edge hem.
Step 3: Now it’s time to do the magic! You want to do a basting stitch all the way down the middle of each strip of fabric you cut for the ruffles. Technically, you should do two rows of stitching to gather in case one breaks, but I’ve never had a problem with one!
This is what it will look like…
Step 4: For each of the ruffle strips, pull one of the strings to gather your ruffle as tight as you want it. Here is what my three ruffles look like:

Step 5: Now you want to pin your ruffle exactly where you want it. I usually only pin the first one and then base the position of the others off that one. However, if you want to be more precise, I would pin all three.

Step 6: Sew down the center of the ruffle (which should be over your gathering stitch). Repeat this for each ruffle. Some people like to remove the basting/gathering stitch after you sew them on like this. I personally just use matching thread and leave it. 🙂 
And that’s it! You should have a ruffled bum! And now you just continue with the construction of the garment as instructed in the pattern instructions! 
Here’s how my finished project turned out! 🙂
Affiliate link disclaimer: Some of the links included in this post are affiliate links. It does not cost you anything extra to purchase using these links, but I do receive compensation (usually 3%) for referring you. I use this to support my sewing hobby. 🙂
Simple Sleeve Stripe Tutorial

Do you want to give your shirt an extra little bit of pizazz?! Well then this tutorial is for you! In just a few simple steps, you can add stripes to the sleeves. Here’s how…
First things first, you will need the following:
- The fabric to make the shirt (I prefer raglan) using any pattern you have (mine came from Christy’s Cute Designs).
- HTV in the color you want to make the stripes (you could also use knit fabric instead of HTV)
- Scissors
- Ruler
- Rotary cutter & cutting mat (optional)
- An iron/ironing board
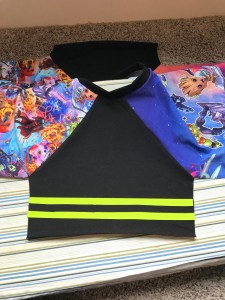
Step 1: Construct your shirt as directed in the pattern instructions, stopping before you sew the side seams together. This is what you should have when you stop:

- Note: You can apply the stripes before you even start constructing the shirt, but I like to do it this way so I have a good visual of placement when I’m deciding.
Step 2: Now you want to figure out how long and wide you want your stripes. For this shirt (which is a size 6), I want to do two stripes on each sleeve. You want to make sure you are taking into account the hem when you are trying to determine your stripe placement. The longest stripe needs to be just under 10″ long (as you can see in the picture below) for me to get two stripes on this sleeve and leave room to hem.

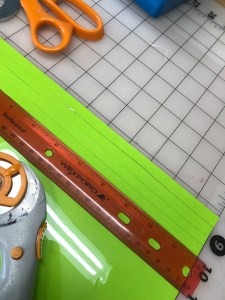
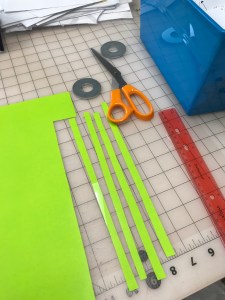
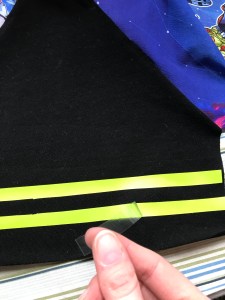
Step 3: After you decide on your measurements, it’s time to cut the HTV! I made my stripes just under 1/2″ here and 10″ long (although 10″ is a little long, I would rather it be a little long and have to trim the edges than be too short). I used a rotary cutter and ruler, but you can also just use scissors if that’s what you have on hand. Here’s me cutting the strips…
And what they look like cut (now, I was not going for perfection here, so I just eye-balled the widths):
Step 4: Now that you have the stripes cut, all you have to do is iron them on! Line them up on the sleeve exactly how you want them to look, with the shiny side of the HTV up. Carefully place a thin shirt/piece of fabric over the stripes and press with your iron (or heat press if you’re lucky). I usually hold it for about 15-20 seconds. Make sure you don’t use steam when pressing! Then just peel off the shiny plastic.
If you want to use fabric strips instead of HTV I would suggest using knit fabric so that it won’t fray. If you iron Heat n’ Bond Lite to the back before you stitch the stripes on they stay a little neater. To use fabric, pin the stripes in place, and stitch 1/8″ from the edge of down each edge of the stripe.
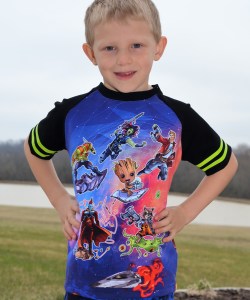
Step 5: Now you’re ready to finish you shirt! Sew those side seams together, hem, and you’re set!!! How easy was that?!
If you want a more in depth tutorial on how to cut and use HTV, check out the guest blog I did over at New Horizons here!
Must Have Baby Rompers

I might have a little addiction to sewing rompers for our baby girl. I just love how cute they are! I also think they come with the ease of a onesie from a practicality standpoint, but look a little more like you tried. That’s a win for me!
So…here is a round-up of some of the romper patterns I’ve used (most of which I sought out reviews to make sure they should actually fit when our baby girl gets here!)
- Bitty Bubble Romper – I love all of the options this one comes with. I used it for our son a few times and probably half of his summer wardrobe last year included the bubble shorts option. Great for both girls and boys and I love that it works with both woven and knit fabrics. And then it comes with a bloomer/shorts/pants option too, which puts it over the top! This is definitely one of the more versatile and most-used patterns I have for the baby/toddler stage. Fabric for the turtle and whale rompers came from Smoogie Fabrics and all of the others came from Christy’s Cute Designs.
- SLPco Romper Bundle/Add-On – This one is drafted to fit several of the dress bodices (both woven and knit) from the SLPco line. These are both knit bodices (I prefer sewing knits :)) and have woven bottoms. I like all of the options you have by just changing up the bodice. The heart fabric here came from Christy’s Cute Designs and the Harry Potter Daily Prophet print is from Snowy Owl Fabrics.


- Whimsy Romper – This pattern is designed for knits, but I was told that if you use the option for a back placket and extend that down into the bottom part it could work with wovens as well (I would think only the bottom not the bodice). My favorite part about this one is the little ruffles around the legs. There’s also a sleeved option for this one too. I wish I could tell you where the pineapples came from, but unfortunately I got those from a destash.

- Emerie Romper – I just love the style of this one! The scales one is actually a little swimsuit that I added a self-drafted skirt to (that’s not included in the pattern) for fun! This one is drafted for knit fabrics and comes with a few options: tank, binding, and a crop top. Scales are from Zenith & Quasar, Princess Tiana is from Christy’s Cute Designs, and the sweet peas are from Sahara Fabrics.


- Muse Romper – I made this for my boys when they were a little older and liked how it worked with cloth diapers (which we plan to use this time around as well) if you use the gusset option. It comes with different arm and leg lengths which makes it an option for everyday-wear rompers and sleepers. There’s also a free file in the Stitch Upon a Time FB group that shows you how to add feet so it’s more like store-bought sleepers. I can’t remember where I got the dinos from, but the cute little squirrels came from The Other Side Textiles.


I’m gearing up to do some more round-up/comparison posts for patterns I’ve been using for my kiddos so stay tuned for more! 🙂
Affiliate link disclaimer: Some of the links included in this post are affiliate links. It does not cost you anything extra to purchase using these links, but I do receive compensation (usually 3%) for referring you. I use this to support my sewing hobby. 🙂
