Sewing-4-Sanity
Thriving not just surviving
Shirtzie & Brazi Wrap Reversible Swim Top Hack & Tutorial

Here’s a fun little tutorial on how to use the Shirtzie bodice to make a reversible wrap swim top! You can use basically the same method to make a similar wrap top using the Brazi bodice pieces. Patterns can be found at Stitch Upon a Time Patterns.
Fabric is from Christy’s Cute Designs
You will need:
- Bodice pattern pieces
- Extra paper
- Swim fabric – Main & Lining
- 1/4” swim elastic – I used a full package for a size small
Steps:
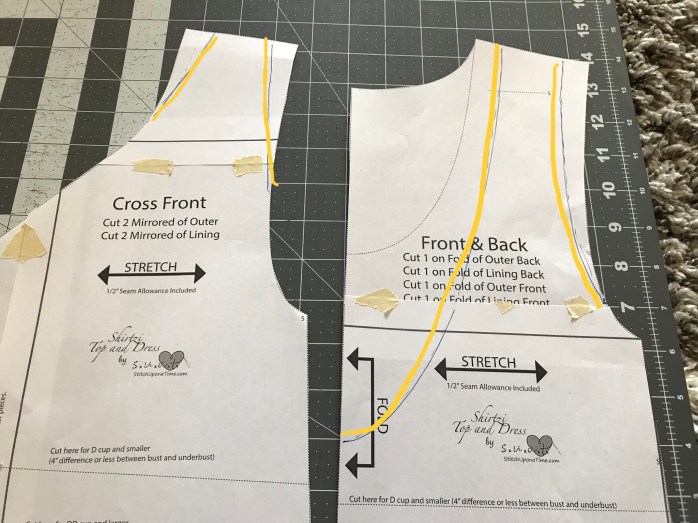
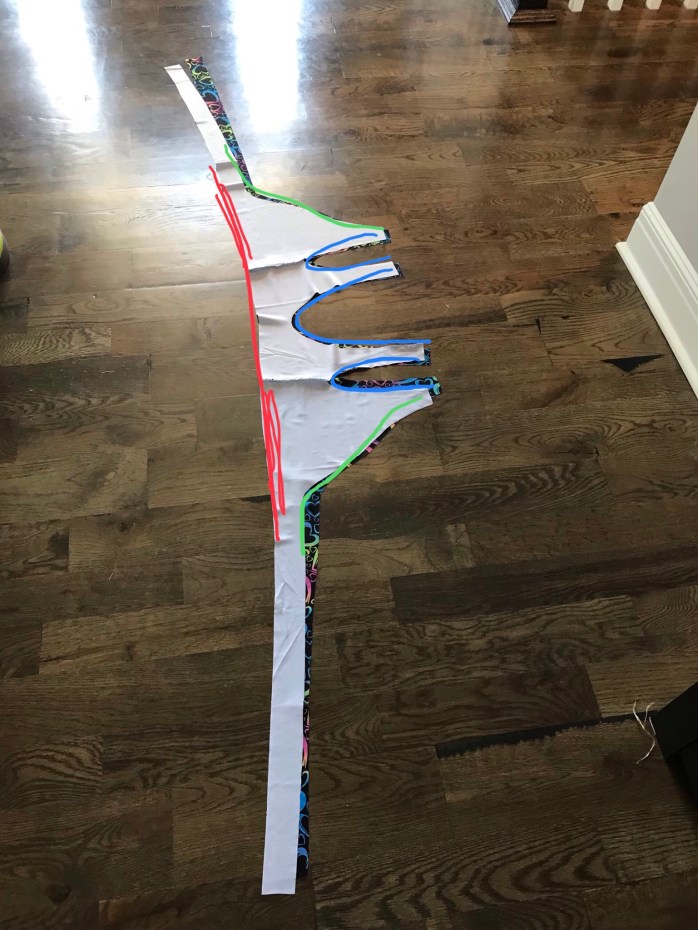
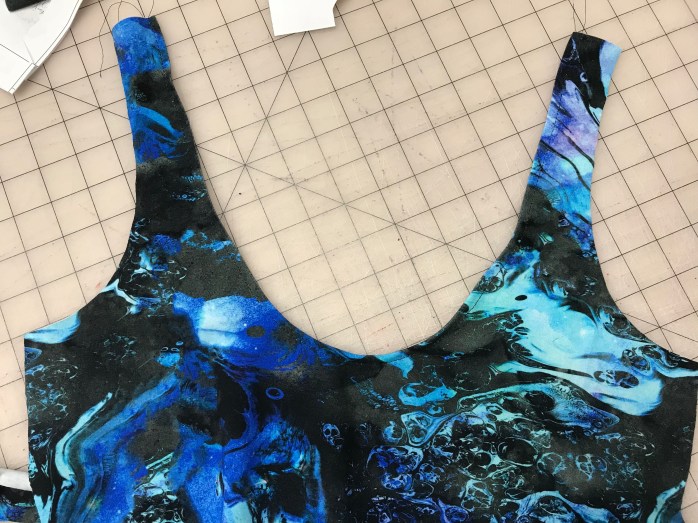
- Trim you bodice pieces so that the straps are a little more narrow. You can see the adjustments I made in the picture below (see the yellow lines). Here I wish I would have trimmed a little more from the armscye side and a little less from the middle.
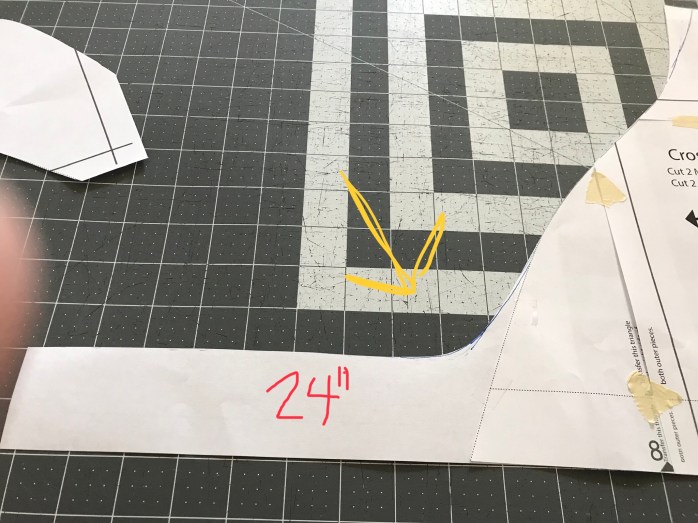
- Next, to get the wrap part on the front you want to gradually slope out the front curve on the front bodice to where it levels out about 2” wide. I made mine 24” long and am pretty happy with that length, although you could definitely get by with less for this size.
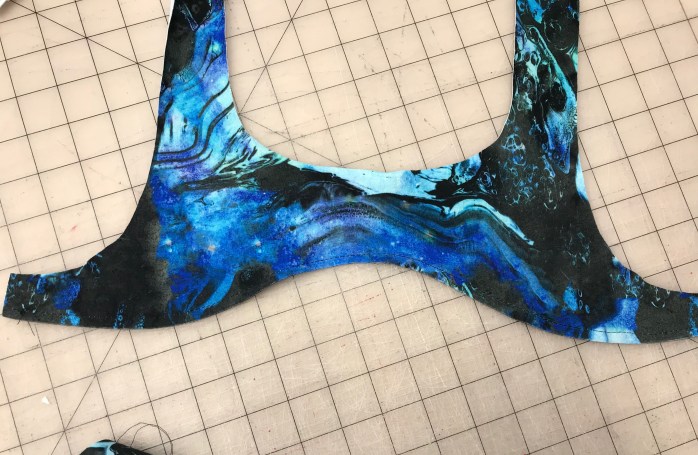
- Now you have your pattern pieces! Cut 2 mirror image pieces of your main and lining fabric (so 4 total pieces) for the front and 1 piece on the fold for the back bodice in each the main and the lining. Here are what mine looked like:

- Sew the main and lining pieces with right sides together, leaving the 4 straps open. (Sew where the yellow lines are, leave open where the red circles are.)
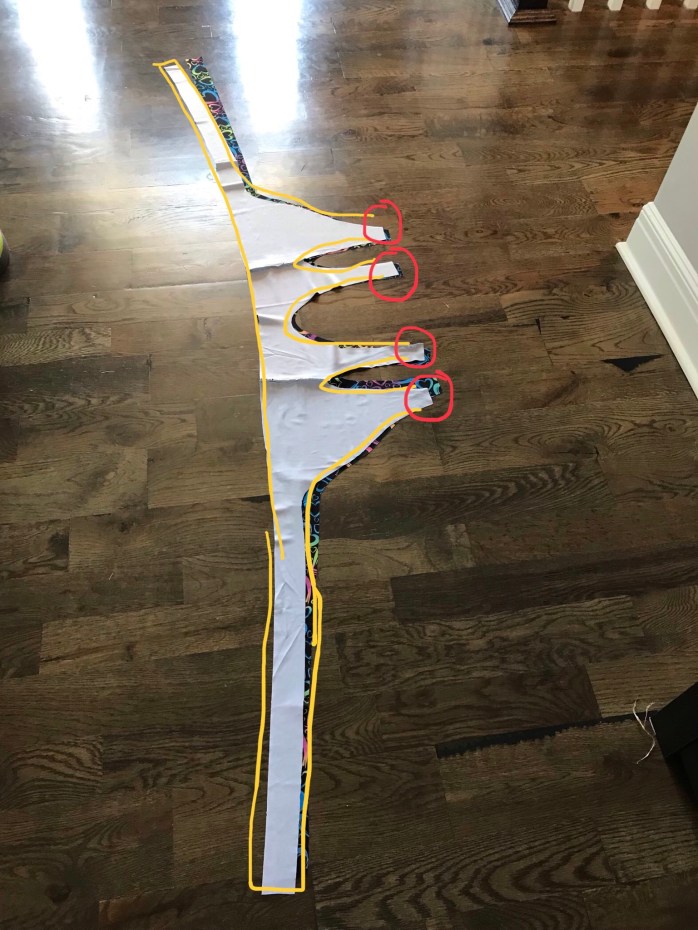
- Add 1/4” elastic in the seam allowance following the color coded picture: blue – don’t pull just keep taut, green – slightly pull while sewing, red – stretch while sewing.
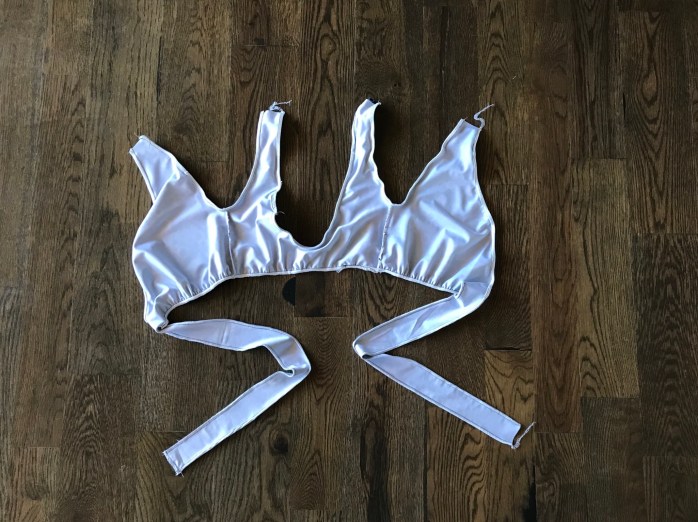
- Flip everything right side out.

- Fold the seam allowance of one bodice strap opening inward.
- Insert the respective back strap into the opening and stitch together (make sure your strap isn’t twisted!) I did 2 rows of stitching to make sure it was secure. Repeat for the other side. Zigzag stitch around the entire suit for a more professional finish. And you’re done!


Here’s an example of a similar one I made awhile back using the Brazi pattern instead:


Breast Pump Comparison & Review: Medela Pump In Style, Medela Freestyle & Freemie Liberty
I am a mom of 4 that has always worked full time. The effectiveness and efficiency of my breast pump makes a huge difference in my life the first 6-12 month post baby. Over the course of the last 7 years, I have used a Medela Pump In Style, Medela Freestyle, and Freemie Liberty. I have used all of them in the past few weeks. I should also note that I have a cup size that ranges from DD-G depending on proximity to birth, so others with a different build may not have the same experience!
As I was sitting in my hotel room last week pumping, I decided to jot down some thoughts I had about each of the 3 I have in case it might be helpful for someone else. So…here’s what I think:
Medela Pump In Style
Pros:
- Great suction – I get the most milk and the quickest
- Dependable
- Easy to use
- Parts are easy to get (Walmart carries them)
Cons:
- Not a closed system – water/milk can get into the tubing (this is annoying and you have to make sure they dry otherwise mold can develop in the tubes)
- Requires an outlet – it is the least convenient because you can not pump everywhere
- Bag is big – the bag the pump comes in is bulky, which can be a pain. However, it does have space to keep all of the pumping supplies, milk bags, breast pads, bottles and ice pack, so that is actually nice too!
Medela Freestyle
Pros:
- Portable!!! You can charge it and pump anywhere, no outlet required
- Pretty good suction – not quite as quick and powerful as the Pump In Style, but still good enough that I could use this pump exclusively
- Closed system – so you don’t have the pesky water getting in the tubes problem
- Parts are easy to assemble
- Machine is small – you can easily toss it in a book bag
Cons:
- Not handsfree (at least for me) – it was advertised as if you could pump while doing dishes or laundry, but I found it did not get me empty if I tried to use it handsfree
- Parts are a little less easy to find
- Suction was not quite as effective as the Pump In Style
Freemie Liberty
Pros:
- Handsfree & quiet – I literally, on multiple occasions, pumped in public and no one knew (I did make use of sweaters to do this)
- Machine is small – you can easily toss it in a book bag
Cons:
- Unreliable – I could get decent suction, but it was very finicky even when I followed all of the advice and troubleshooting provided by the company
- Suction was not as good as either Medela product even when it was working
- Parts are very expensive and must be ordered online
- The design is flawed – it’s difficult to make sure the nipple is attached correctly because it’s hard to see through the plastic
Summary
With each pregnancy, my Medela Pump In Style has been a staple…I keep coming back to it for my everyday, dependable pump. The other two I have used for their portability features, but don’t like to depend on them. I get slightly less milk, but I think the Freestyle could work as my everyday pump as well. I would not recommend the Freemie despite all of the awards it touts (that’s what sold me!).
These are just my opinions and experiences, of course, so take from it what you will! 😊 And happy pumping!
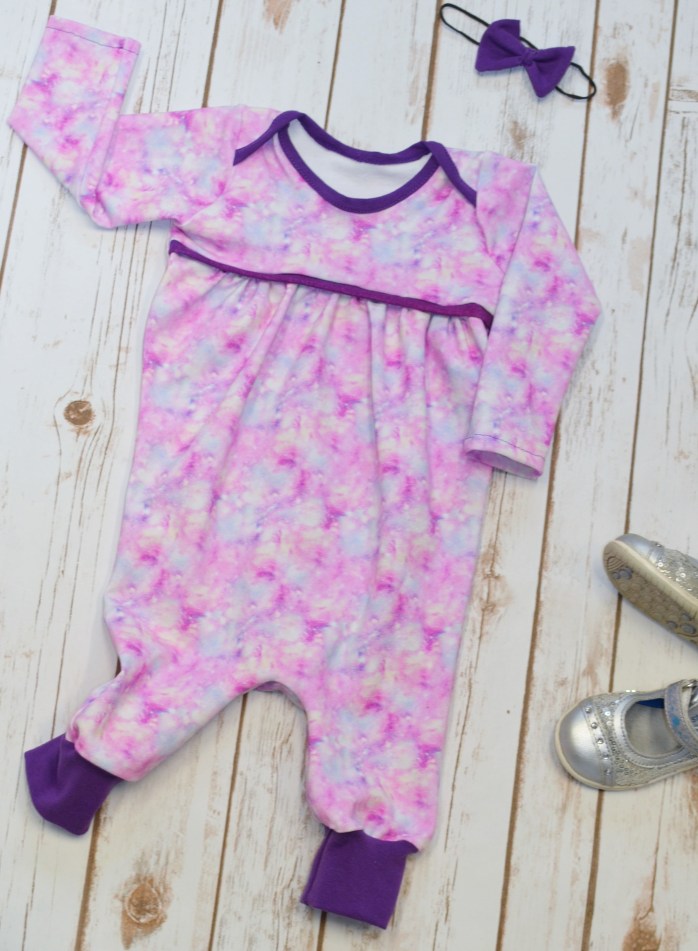
Gathered Romper Hack

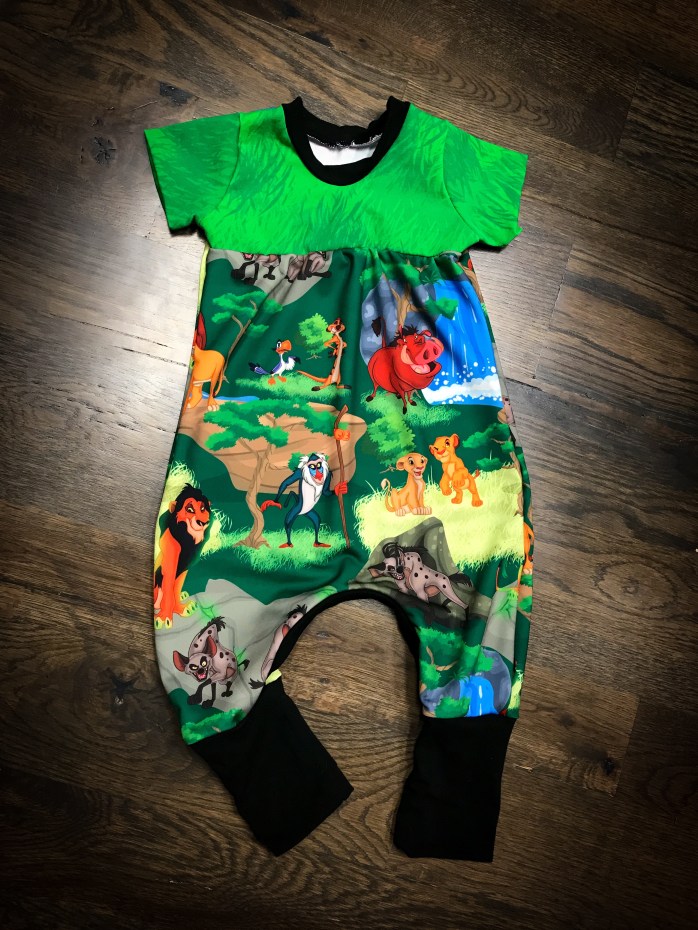 I am a serial pattern hacker. I get a pattern and I see it’s untapped potential! Here’s a little hack that works well with a few rompers I have…more specifically, these are Ellie & Mac Beatbox Romper and the Ellie & Mac Good Baby Romper. I used fabric from Snowy Owl Custom Fabric and Christy’s Cute Designs.
The best news…it’s really easy!
Here’s what I did:
- Cut a curved shape out of the bodice. I found that depending on the size, a couple inches below the armscye is a good cut line. Here’s what mine looks like:
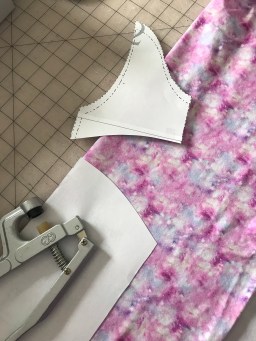
- You want to cut one of those out on the fold, adding in a seam allowance where you made the cut.
- For the bottom part, to get the gathered effect, you want to create a gradual curve starting from about even with the crotch curve out to a point that is approximately 2x the width of the pattern piece. Make sure you add a seam allowance to this side too! Here’s a visual of mine:


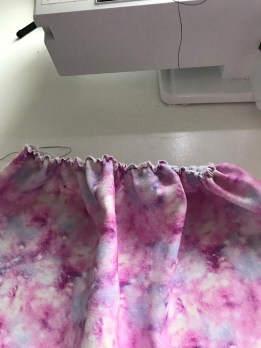
- Run a gathering stitch and gather the bottom piece so that it is the same width as the bodice piece.
- Next, if you like piping, cut a piece of piping the width of the top of the bodice piece ( or a little bit longer to give yourself some room for error 🙂 ). I made mine 1″ wide to get the look here:
 default
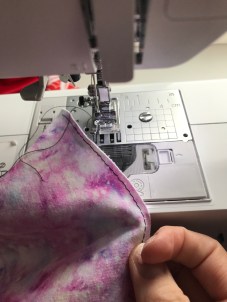
 - Fold the piping piece wrong sides together with the raw ends matching up, and sandwich it between the bodice piece and the bottom gathered part (bodice and bottom should be right sides facing).


- Sew them all together!

- For a more professional finish, press and topstitch. Trim any excess so that it matches the original pattern piece. Then you’re ready to treat it just like the normal romper piece and follow the rest of the pattern instructions!
- Here’s my finished product 🙂
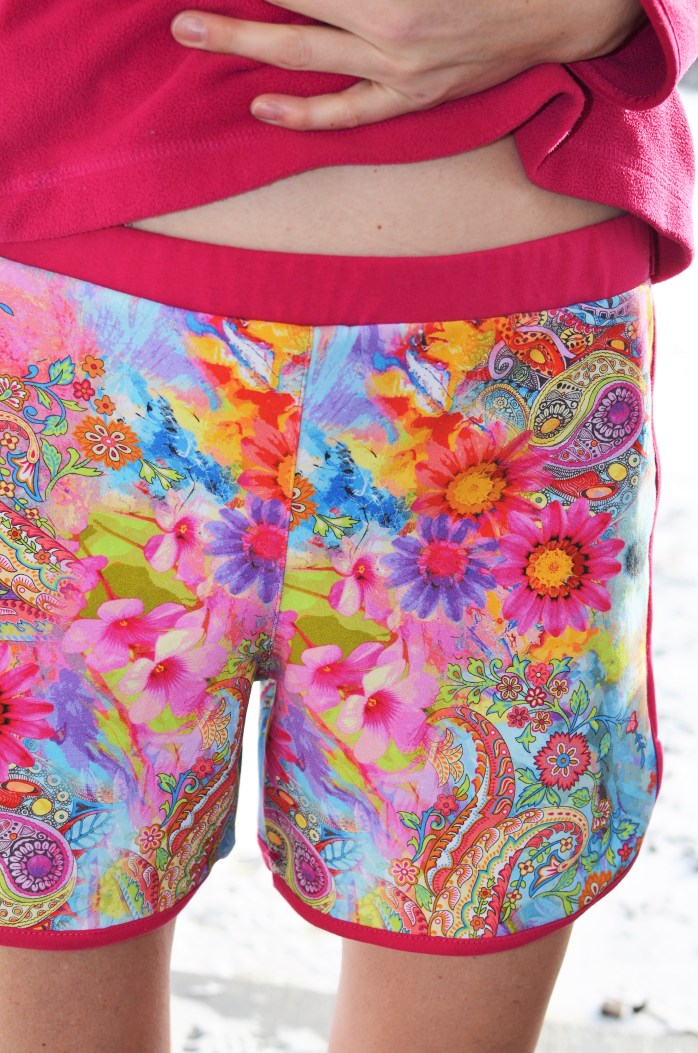
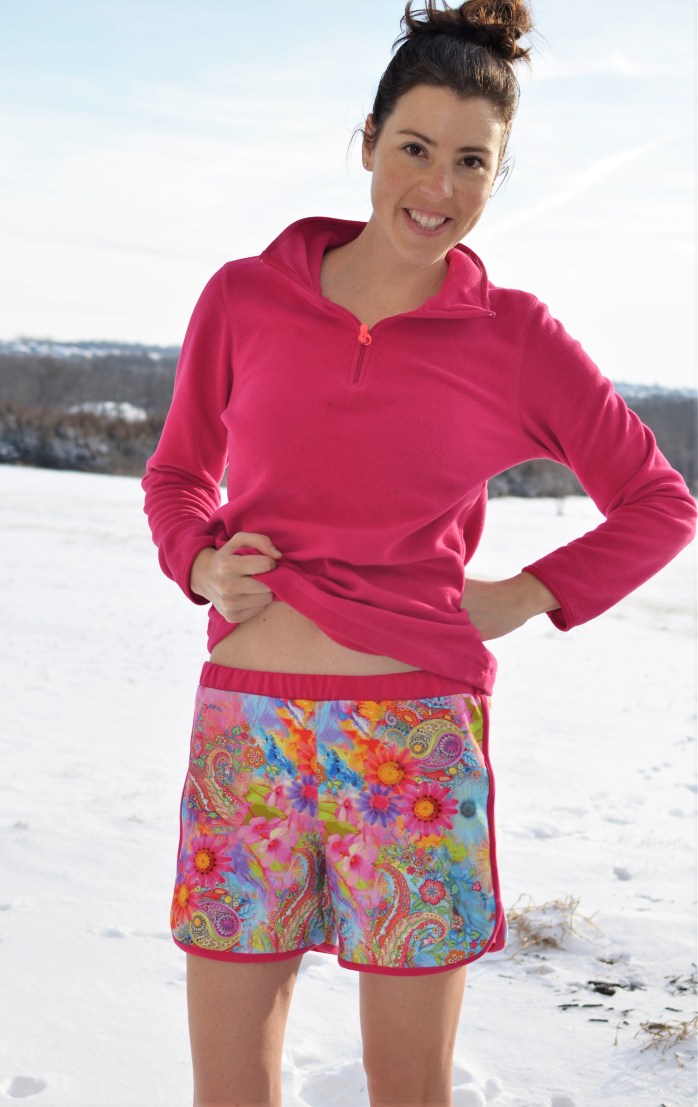
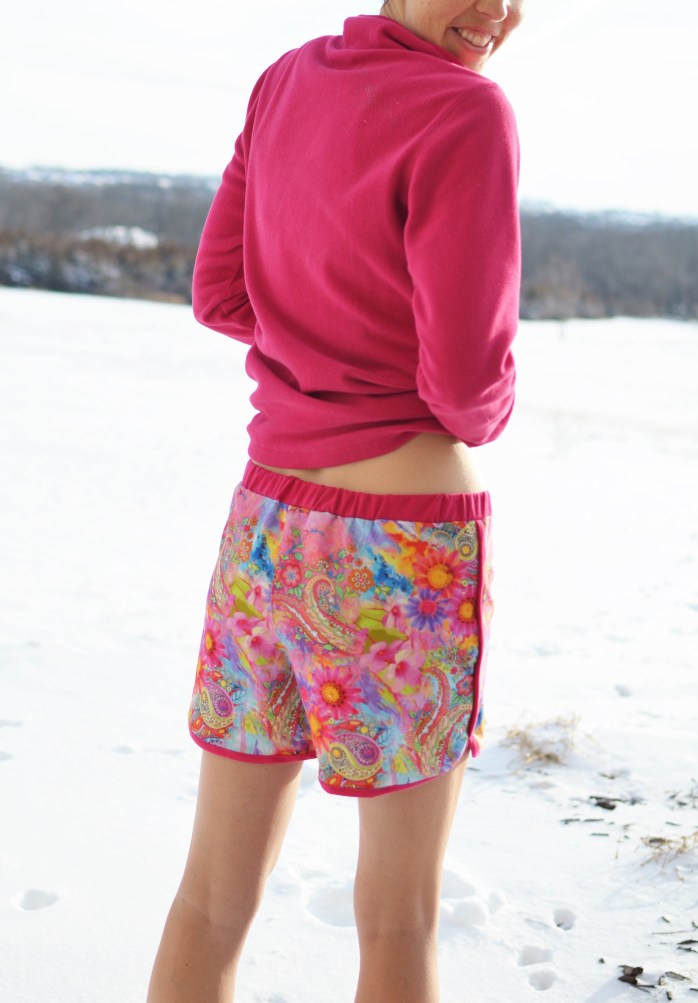
Free Pattern Review & Hack – Women’s Shorts – Purl Soho City Gym Shorts

Who doesn’t love free stuff?! There are SO many awesome free sewing patterns out there (beware there are also lots of not so great ones!) I thought it would be fun to review some of the ones I’ve tried, so…here’s my first go at it! I’m going to try to do a new one every couple of weeks, so follow my blog if you want to see more free patterns!
For this first review, I tried a pattern and designer that are new to me. This was my first attempt at a Purl Soho pattern. You can get the pattern here: Purl Soho City Gym Shorts. I used custom cotton lycra knit to make these from here: Smoogie Fabric.
I made a couple of modifications, but overall I was very happy with pattern. It also comes in kids sizes, so it would be a fun pattern to use for Mommy & Me outfits!
The modifications I made:
- The pattern is designed to be used with woven materials. I used a medium/heavy weight knit – cotton lycra. I fall right in the middle of the size chart for the size I made and probably could have sized down. If you are on the lower end of a size, I would probably size down if using knit instead of woven.
- There is a lengthen/shorten line on the pattern. I am tall, so I lengthened by about 1.25″ at the line provided on the pattern pieces.
- I thought the method described in the instructions for the waistband might be too bulky when using knit, so instead of following the instructions provided I cut a piece 2.75″ x the length in the instructions (versus 4 3/8″ width), sewed the short ends together, folded with wrong sides together so that raw ends matched up, sandwiched the elastic between, and then attached with a 1/4″ seam allowance.
- Shortened the waist elastic by a couple of inches.
What I liked about the pattern:
- Love the design and look! I will definitely be making more, in knit and woven!
- It’s a pretty quick sew.
- The pattern is only 8 pages! I’ve had some women’s patterns take up to 70 pages, so this was a dream!
- I got a good fit with my first sew, even though I used a different type of fabric. I’m sure the fit would have been even better using recommended fabrics.
- Would be good for colorblocking.
Room for improvement:
- I wish the seam allowance was on the pattern pieces. Once I print a pattern I like for it to stand alone so I don’t have to go back and find the instructions later.
- The pattern pieces aren’t the trimless pages I have grown accustomed to in the PDF pattern world. But again, I’m not going to complain with it only being 8 pages (and free!).
- It’s not hard to measure the pattern pieces, but it would have been helpful to note in the instructions what the inseam length of the finished shorts was to aid in the shortening/lengthening process.
- Again, it’s free, so this is more of a wish than a complaint, but I loved it enough I wish it went down to smaller kid sizes so I could make a matching pair for my mini. 🙂
Here are some more pictures of my shorts (I’ll confess I took these before I gave them a good press, so don’t judge, there is a little waviness on my bindings :)):
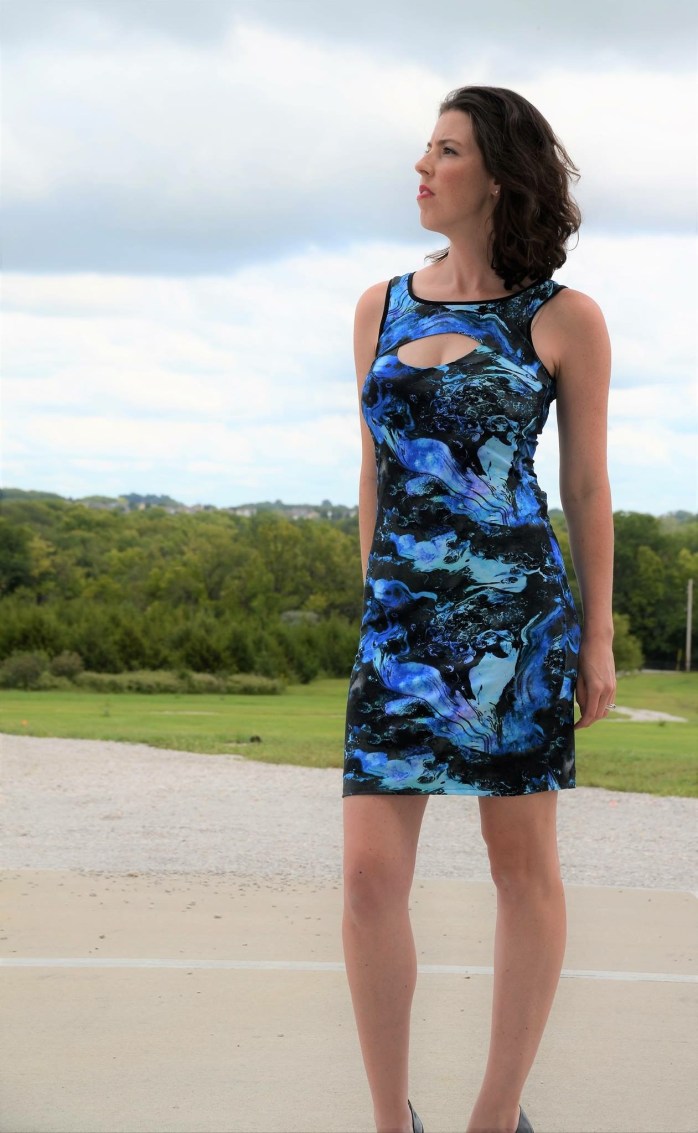
Simple Hack for a Peek-a-boo Hole

This is a really easy hack to give your dress or top just a little extra interest! I used the Excalibur Dress/Tank pattern from Stitch Upon A Time, but you could do this to other tank patterns with similar types of adjustments.
I used custom weight cotton Lycra from Smoogie, but have also used DBP and will probably try a good quality French terry for another.
How to do it:
The first step is getting all of the right pieces for your dress (or top). One of the things I love about the Excalibur is that I’ve found I can wear it with either side facing the front if I use two back pieces instead of a back and a front. So I cut two normal back pieces plus an extra piece to go over top to create the peek-a-boo hole.
To make the extra piece, trace around the top part of the back piece (on the fold), stopping about 1.5” into the armscye. Then to create the hole, make a cutout on the folded side, blending it into the other side. I started my cutout 2” up, but…I forgot to take into account hemming so next time I’ll make a slightly less dramatic hole and do 1.5”!
This is what it looked like: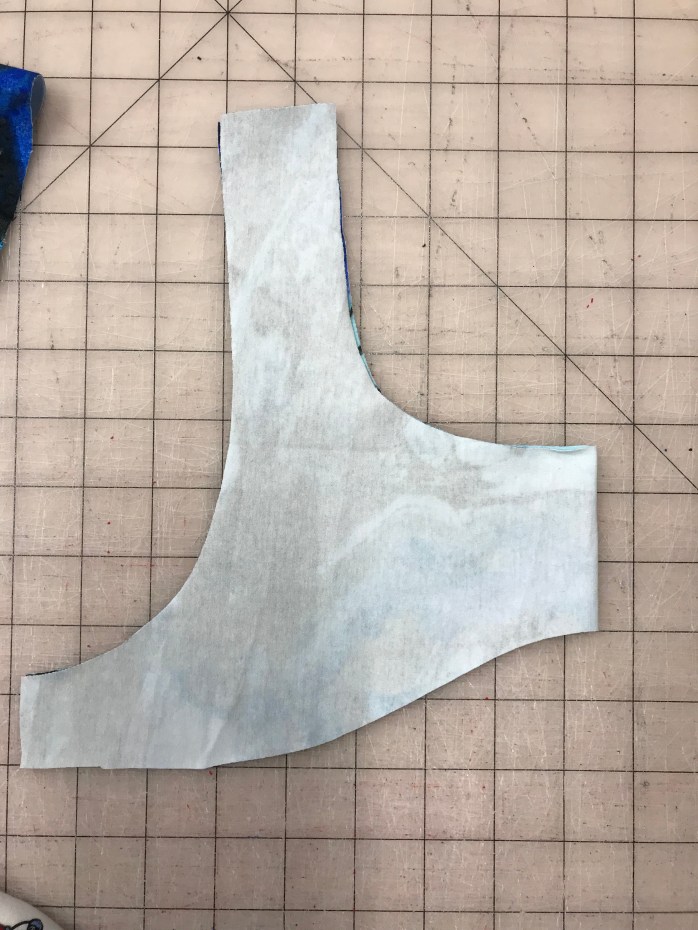
Next, take the piece that is going to be the front of the dress and lower the neckline however much you want (I lowered mine about 2”). Remember to make it a little higher than you want the finished product because we will be hemming it at 3/8”.
Hem the neckline of the full piece and the bottom where you made the cutout on the top piece. Here’s what the full front piece looks like:
And here’s our top front piece:
Now place the top piece on top of the full piece, lining them up at the armscye. Baste them together at the armscye.


Now you have a front front and a back piece and can finish construction as directed in the pattern. Sew together at the shoulder, then at the side seams, measure your new neck and arm openings (I do my bands at 85% of the opening and these were 1” thick), add bands, hem the bottom, and voila – you’re done!
This was my final product!