Sewing-4-Sanity
Thriving not just surviving
Quick Ruffle Bum Tutorial

I have to admit, when we found out we were having a girl, I was terrified of ruffles. I’ve come a long way in the last few months! Here’s a quick and dirty method to add ruffles to the bum of bloomers, shorts, pants, dresses, or whatever you’d like to ruffle!
What you need to get started:
- Whatever you plan to put ruffles on – for this tutorial I’m using Bitty Bubble romper bloomers.
- Knit fabric to make the ruffles
- Pins
I’m using fabric from Smoogie Fabrics for my ruffles (leftover from the Seahorse panel).
Step 1: Cut out the back pattern piece that you plan to add ruffles to.

Step 2: Now you want to cut some ruffles. I’m using the scraps from the Seahorse panel I used for the dress, so mine are going to be a little shorter than I would have otherwise liked. I cut mine about 1.5″ wide and you want the length to be about twice as long as you want the finished ruffle. Some people prefer to have the ruffle go all the way across the bum, but because I’m limited by my scrap size, I did mine shorter.
 I cut three, but here are what the first two looked like once I had them cut. I laid them across the bum piece to give you an idea of length.

Note: I don’t mind the look of an unfinished edge when using cotton/lycra blend fabrics and leaving the edge raw saves me time (who doesn’t like that, right?!), but…if you’re using a different type of material or the raw edge bothers you, you will want to finish the edge before you gather. You can do this by doing a rolled hem, regular hem, or lettuce edge hem.
Step 3: Now it’s time to do the magic! You want to do a basting stitch all the way down the middle of each strip of fabric you cut for the ruffles. Technically, you should do two rows of stitching to gather in case one breaks, but I’ve never had a problem with one!
This is what it will look like…
Step 4: For each of the ruffle strips, pull one of the strings to gather your ruffle as tight as you want it. Here is what my three ruffles look like:

Step 5: Now you want to pin your ruffle exactly where you want it. I usually only pin the first one and then base the position of the others off that one. However, if you want to be more precise, I would pin all three.

Step 6: Sew down the center of the ruffle (which should be over your gathering stitch). Repeat this for each ruffle. Some people like to remove the basting/gathering stitch after you sew them on like this. I personally just use matching thread and leave it. 🙂 
And that’s it! You should have a ruffled bum! And now you just continue with the construction of the garment as instructed in the pattern instructions! 
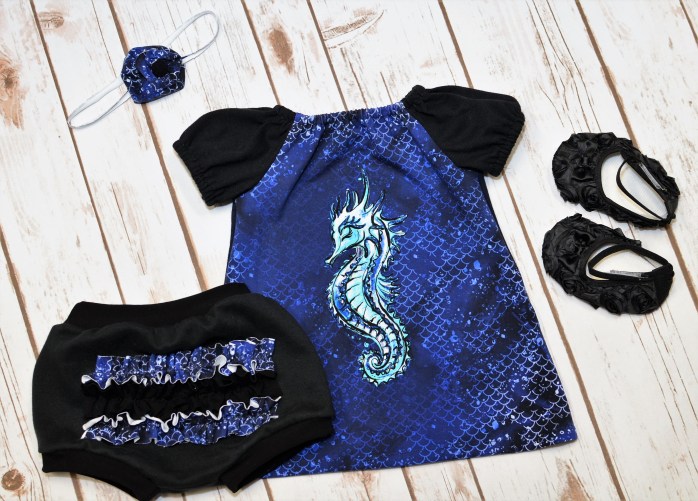
Here’s how my finished project turned out! 🙂
Affiliate link disclaimer: Some of the links included in this post are affiliate links. It does not cost you anything extra to purchase using these links, but I do receive compensation (usually 3%) for referring you. I use this to support my sewing hobby. 🙂
